Foundational, platform-independent C++ classes for math, geometry, i/o and other utilities, applicable to any application development.
Contents
Scope
This library is designed to be cross-platform, supporting Linux, iOS, macOS and Windows (including C++/CLR contexts). The base standard is currenty C++20 to allow broad compiler support.
Installation
Requirements
Compiler must support C++20
Dependencies
None
Building
The library can be built using a variety of tools. Unit tests build and run in each context:
| Cmake | Built against DocTest |
| Visual Studio | Run in Test Explorer |
| Xcode | Run with XCTest |
Cmake
The following command-line instructions will build the library and tests:
cmake -B ./build
cmake --build ./build --config Release
Note: Directing the output to a build directory is simply a practical suggestion, not a requirement. The build output can be directed anywhere.
For Visual Studio builds, it's prudent to specify a compiler and toolset, e.g.:
cmake -B ./build/v143 -G "Visual Studio 17" -A x64 -DCMAKE_GENERATOR_TOOLSET=v143
cmake --build ./build/v143 --config Release
Unit tests are built into a single executable called activelibtests and can be executed from the command-line, e.g.:
./activelibtests
Visual Studio
- Open ActiveLib.sln in Visual Studio 2022
- Pick the target Release17
- Click the menu Build > Build Solution
- Run unit tests by clicking Test > Run All Tests
Xcode
- Open ActiveLib.xcworkspace in Xcode
- Pick the scheme ActiveLib-Release
- Click the menu Product > Build
- Run unit tests by clicking Product > Test
Documentation
The source contains Doxygen-style quotes for building a documentation set, which can be viewed here.
Alternatively, the documentation can be built using the configuration file ./Documentation/Doxyfile, either through the GUI application or from the command line: doxygen ./Documentation/Doxyfile
The latter will build the documentation into ./Documentation/html/
Using as IDE Project Dependency
If ActiveLib is used as a dependency for an application within an IDE (VS or Xcode), the most convenient method is to embed the dependency directly into the parent solution/workspace so the library is automatically built and linked into the parent.
As a Visual Studio Dependency
First add the ActiveLib project to your VS solution by right-clicking on the solution, picking Add > Existing Project, navigating to the ActiveLib project file and clicking Open.
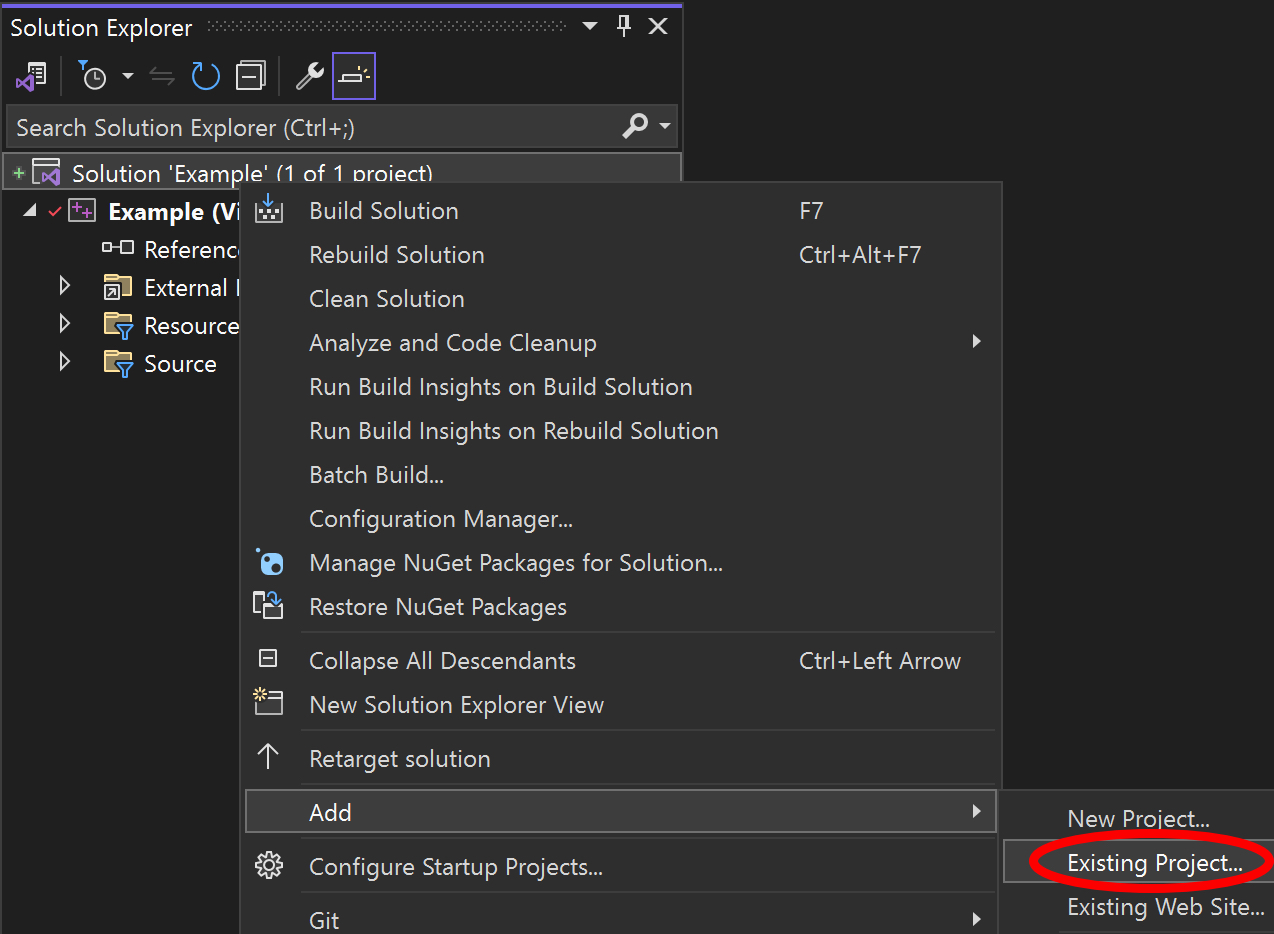
The ActiveLib project should now appear in the solution explorer.
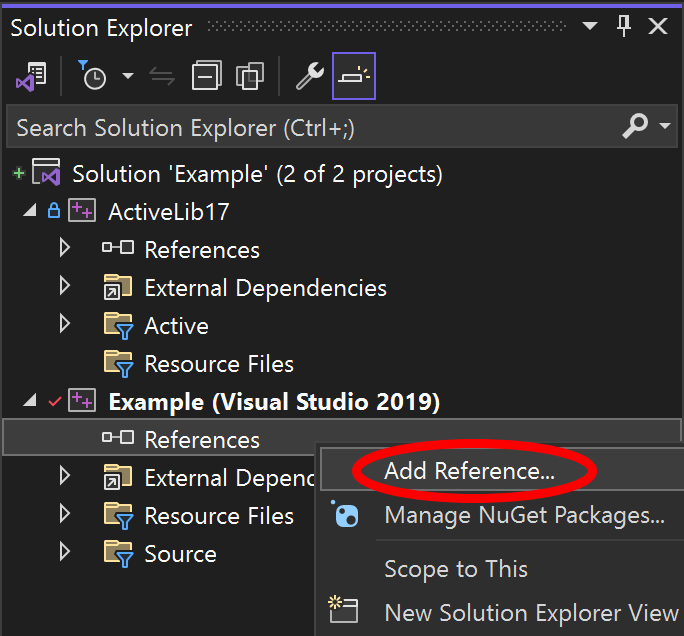
Next right-click on the References of the project to depend on ActiveLib and pick Add Reference. A dialog should appear with ActiveLib in a list - tick the adjacent check-box to add it as a reference.
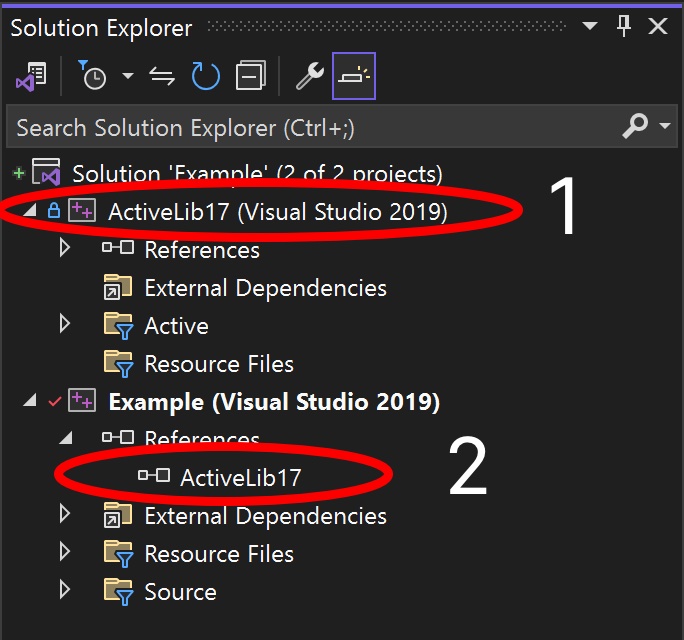
The solution explorer should now include:
- The ActiveLib project
- ActiveLib17 (or 16) as a referenced library.
Any changes to ActiveLib should automatically build and link into your solution.
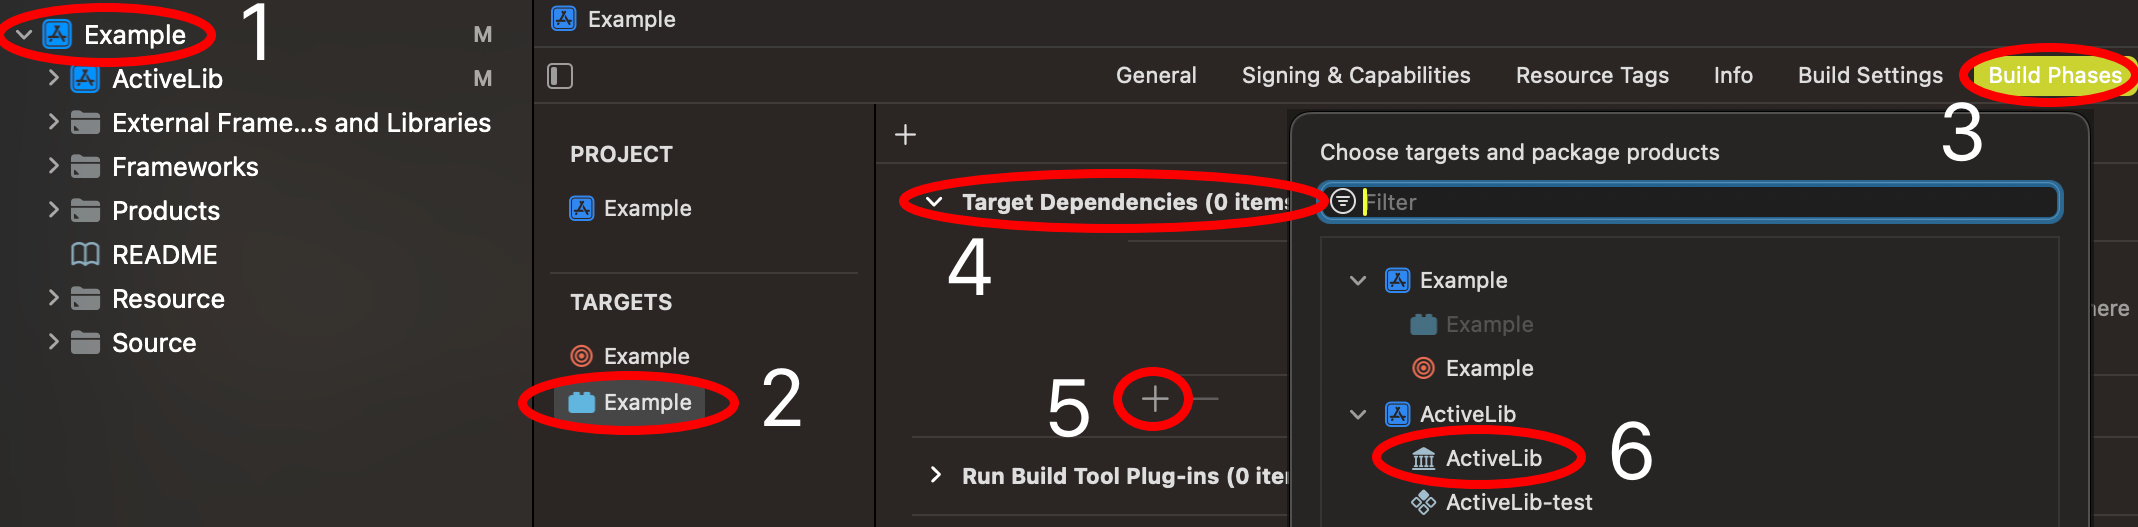
As an Xcode Dependency
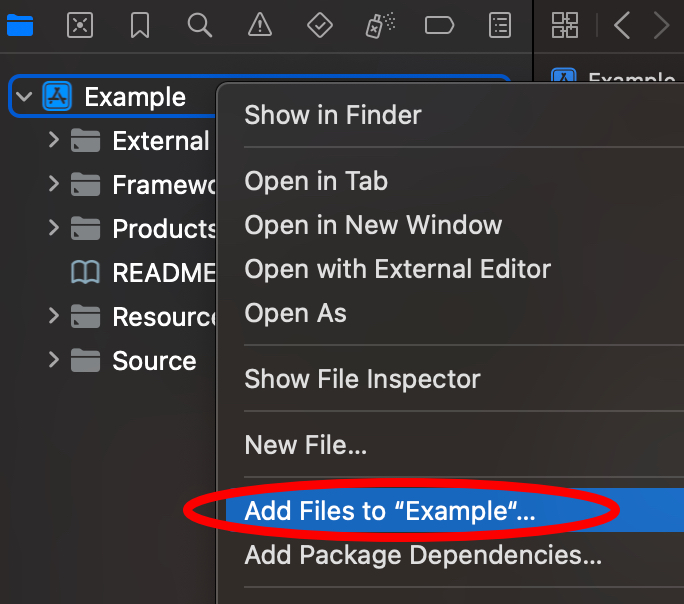
First add the ActiveLib project to your Xcode workspace by right-clicking on the workspace, picking Add Files to "Workspace"…, navigating to the ActiveLib project file and clicking Open.
Then add ActiveLib to the target as a dependency:
- Click on the workspace;
- Select the relevant target;
- Click Build Settings;
- Expand Target Dependencies;
- Click the + button;
- Select ActiveLib.
The ActiveLib project should now appear in the workspace hierarchy.
Then add the ActiveLib product library to be linked against the build. The first 3 steps are as above - then:
- Expand Link Binary With Libraries;
- Click the + button;
- Select libActiveLib.a

Any changes to ActiveLib should automatically build and link into your project.